In order to install SystemJ Developer with the tools for editing, compilation and debugging of SystemJ programs, please do the following checks and go through the procedure and steps defined below.
Supported Platforms:
The SystemJ Development Tools are supported on the following platforms:
- Linux (specifically tested on Ubuntu 9.10, Fedora 13 and Debian 5.0)
- Mac OS-X
- Windows (XP or greater)
- Unix (specifically tested on FreeBSD 7.2 and OpenBSD 4.6)
The tools are most mature in the Windows environment but may also work on any platform where the prerequisite software (see below) is available. Currently there is no formal support for any platforms apart from those listed above but should issues arise please let us know and we will endeavour to help you.
Prerequisites:
The SystemJ Development Toolkit requires the following software to be installed on your computer:
-
Java Development Kit 1.6 or greater (both the Sun JDK and OpenJDK are supported, see http://www.java.com/en/download/).
N.B. On Ubuntu 9.10 the prerequisites can be installed with the command ‘sudo apt-get install eclipse’. On Fedora 13, Eclipse can be installed with the command ‘sudo yum install eclipse’. Other Linux distributions may also be able to install the tools via their respective package managers. On the BSDs the software can be added using the ‘pkg_add’ command or the ports tree. Windows and Mac OS-X users should follow the links given above for installation of the required components.
Website Registration:
In order to install and use the SystemJ development Tools registration is required. Please fill in the registration form. After you have completed the registration you can log in to this site and request a licence key from the ‘Your Profile’ page.
Installing the SystemJ Development Tools
Option One: Pre-Packaged Download:
- Windows – 32-bit | 64-bit
- Linux – 32-bit | 64-bit
- Mac – 32-bit | 64-bit
Option Two: Installing the plugins via the update site (Requires Eclipse pre-installed):
- In Eclipse open the software install wizard (Help->Install New Software).
-
In the resulting wizard first check that the Galileo update site is enabled (if not add it with the URL: http://download.eclipse.org/releases/galileo).
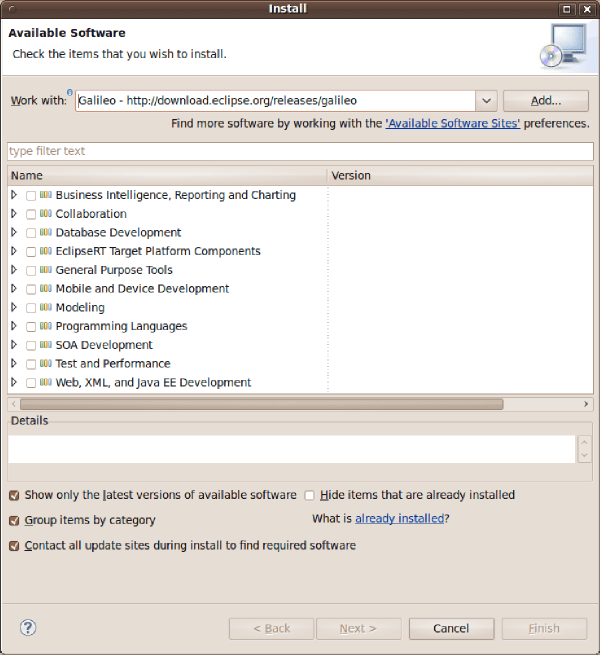
Galileo Update Site
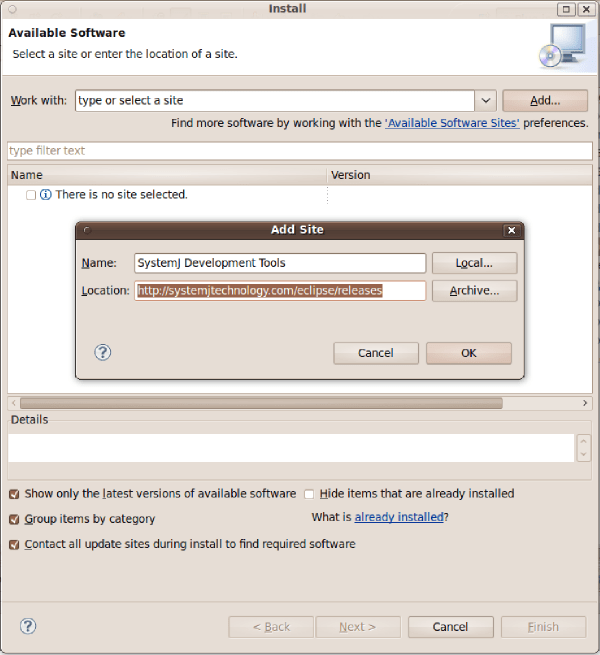
-
Next add the SystemJ update site from the URL: http://update.systemjtechnology.com/releases
SystemJ Update Site
-
Upon clicking ‘OK’, the update site should load the list of plugins. Select them to mark for installation.
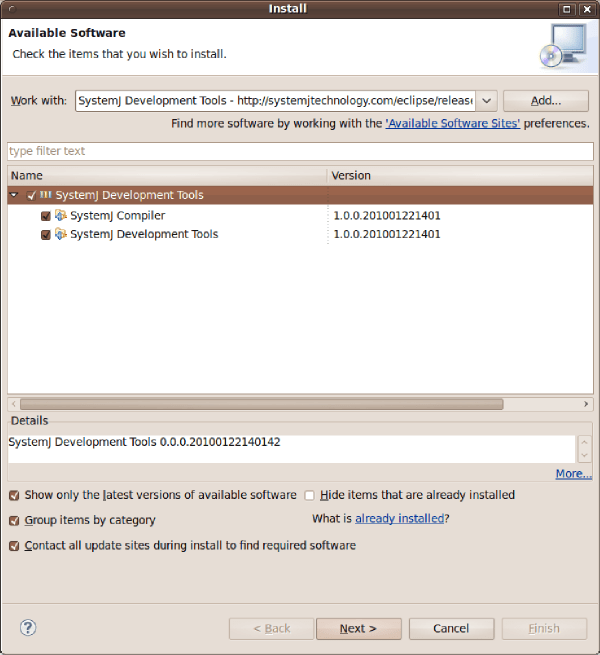
-
Click ‘Next’, this will take you to a screen showing you what will be installed. Click ‘Next’ again.
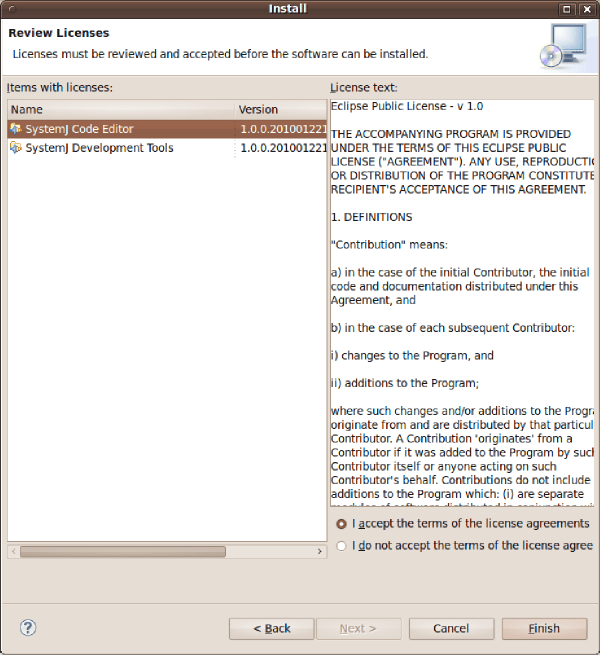
-
On the next screen you will be asked to agree to the licence agreements for the plugins (link to a page detailing what plugins are under which licences). Once you have reviewed the licences select the ‘I accept…’ option and click ‘Finish’ to begin the installation.

License Agreement Screen
-
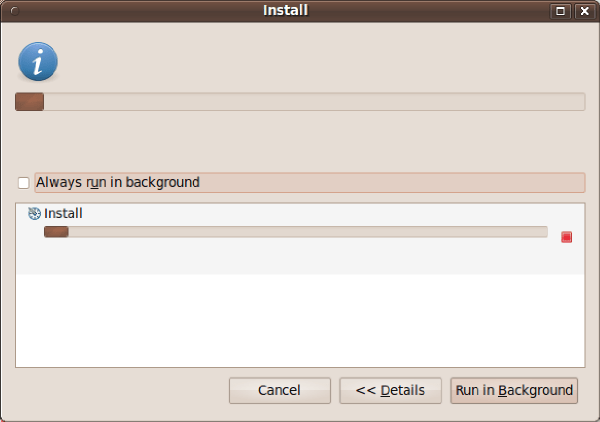
The plugins will download and install.
Plugin Download Screen
-
Once the installation is finished you will be prompted ro restart Eclipse, click ‘Yes’ to enable your new plugins.
Restart Eclipse
-
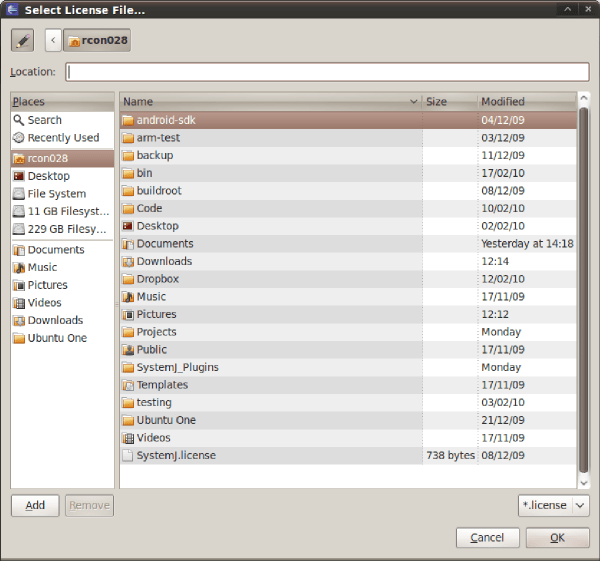
Once you restart you will be prompted for your licence key (which you should have received by email when you registered on the website). Select the location of the licence key in the file selection dialogue and it will be copied into the plugin directory for correct operation of the compiler.
-
SystemJ is now installed!